Rails 2.0 and Scaffolding Step by Step
Rails 2.0 step by step.
Ruby on Rails 2.0 was released by the Rails core team on Friday, December 7th. There were quite a few changes in the 2.0 release, including the way that Rails generates scaffolding code. This change will probably cause trouble for people using tutorials written for previous versions of Rails. I hope this tutorial will help readers get started with Rails 2.0 and keep the community of Rails developers growing.
This is the first part of a multi-part tutorial. It will cover enough to get a scaffolded Rails application up and running under Rails 2.0.
This first installment of the tutorial will cover installing Rails and then using Rails to generate a new scaffolded application capable of the four basic database functions of creating, reading, updating, and deleting data. Later installments will cover replacement of scaffolding with actual code that will add to the model view and controller portions of the Rails application. The goal of this first part of the tutorial is to get new users over the changes made to scaffolding in Rails 2.0, and get the basic scaffolded application up and running.
Rails has proven itself to been excellent choice for the needs of most teams and projects.
Note:If you are following a detailed tutorial or book based on earlier rails version, it would probably be best to install an earlier version of Rails for use with that book. For example, the book Agile Web Development with Rails (AWDWR) by Dave Thomas and David Heinemeier Hansson is based on Rails 1.2.x. Instructions on how to install an earlier version of Rails are given later in this tutorial.
Use this tutorial to get started with Rails 2.0 and not older versions.
You will need to have MySQL installed on your system to follow along with this tutorial. You can search the web for the best way to install MySQL on your system, It won't be covered here.
Installing Rails 2.0
Installing Rails 2.0 is done the same way as in 1.2.x versions of rails. There are basically three steps to follow.
- Install Ruby for your Distro or OS
- Download and install Ruby gems
- Use gems to install rails
On my debian machine I used the following commands to install Rails 2.0.
Install Ruby:
Change to the superuser and use the debian package manager to install ruby
# apt-get install ruby irb ri rdoc build-essential
Install Ruby gems:
Then download Ruby gems, the ruby package management software, unpack it, change into the rubygems directory and run the file setup.rb as superuser:
$ tar -xvzf rubygems-0.9.5.tgz
$ cd rubygems-0.9.5
$ su
# ruby ./setup.rb
Use gems to install Rails:
The gem package manager can install Rails and all of its dependencies. As superuser issue the command:
# gem install rails --include-dependencies
INFO: `gem install -y` is now default and will be removed
INFO: use --ignore-dependencies to install only the gems you list
Successfully installed rake-0.7.3
Successfully installed activesupport-2.0.1
Successfully installed activerecord-2.0.1
Successfully installed actionpack-2.0.1
Successfully installed actionmailer-2.0.1
Successfully installed activeresource-2.0.1
Successfully installed rails-2.0.1
7 gems installed
Installing ri documentation for rake-0.7.3...
Installing ri documentation for activesupport-2.0.1...
Installing ri documentation for activerecord-2.0.1...
Installing ri documentation for actionpack-2.0.1...
Installing ri documentation for actionmailer-2.0.1...
Installing ri documentation for activeresource-2.0.1...
Installing RDoc documentation for rake-0.7.3...
Installing RDoc documentation for activesupport-2.0.1...
Installing RDoc documentation for activerecord-2.0.1...
Installing RDoc documentation for actionpack-2.0.1...
Installing RDoc documentation for actionmailer-2.0.1...
Installing RDoc documentation for activeresource-2.0.1...
Checking the version of Rails at the command line should give a version number for Rails:
$ rails -v
Rails 2.0.1
If you have trouble installing Rails follow the links above or go to the Rails Forum for help.
Using older versions
If you are using a book like AWDWR from the pragmatic programmers It would probably be best to use an earlier version of Rails. To install a previous version of Rails, use the following command:
# gem install --version=1.2.5 rails --include-dependencies
INFO: `gem install -y` is now default and will be removed
INFO: use --ignore-dependencies to install only the gems you list
Successfully installed activerecord-1.15.5
Successfully installed actionpack-1.13.5
Successfully installed actionmailer-1.3.5
Successfully installed actionwebservice-1.2.5
Successfully installed rails-1.2.5
5 gems installed
Installing ri documentation for activerecord-1.15.5...
Installing ri documentation for actionpack-1.13.5...
...
$ rails -v
Rails 1.2.5
Updating old versions of Rails
In order to update an older version of Rails to the most current, use the gem command:
$ gem update rails –-include-dependencies
Now let's see how we can get a basic Rails application up and running with a few commands
Using Rails 2.0
Getting started and checking out our installation
Creating a new project in Rails 2.0 starts out much like previous versions. This tutorial uses the example of creating an application to manage the inventory at a local Mom and Pop video rental store, Mom and Pop's Movie Exchange. We'll call the project 'exchange'.
We'll create a directory to keep our work in, change to that directory and use the 'rails' command to create the shell for the exchange application. A great deal of information will flash by on your terminal as Rails creates the basic structure of the application.
$ mkdir work
$ cd work
work$ rails exchange
create
create app/controllers
create app/helpers
create app/models
create app/views/layouts
create config/environments
create config/initializers
create db
create doc
create lib
create lib/tasks
create log
create public/images
create public/javascripts
create public/stylesheets
create script/performance
create script/process
create test/fixtures
create test/functional
create test/integration
create test/mocks/development
create test/mocks/test
create test/unit
create vendor
create vendor/plugins
create tmp/sessions
create tmp/sockets
create tmp/cache
create tmp/pids
create Rakefile
create README
create app/controllers/application.rb
create app/helpers/application_helper.rb
create test/test_helper.rb
create config/database.yml
create config/routes.rb
create public/.htaccess
create config/initializers/inflections.rb
create config/initializers/mime_types.rb
create config/boot.rb
create config/environment.rb
create config/environments/production.rb
create config/environments/development.rb
create config/environments/test.rb
create script/about
create script/console
create script/destroy
create script/generate
create script/performance/benchmarker
create script/performance/profiler
create script/performance/request
create script/process/reaper
create script/process/spawner
create script/process/inspector
create script/runner
create script/server
create script/plugin
create public/dispatch.rb
create public/dispatch.cgi
create public/dispatch.fcgi
create public/404.html
create public/422.html
create public/500.html
create public/index.html
create public/favicon.ico
create public/robots.txt
create public/images/rails.png
create public/javascripts/prototype.js
create public/javascripts/effects.js
create public/javascripts/dragdrop.js
create public/javascripts/controls.js
create public/javascripts/application.js
create doc/README_FOR_APP
create log/server.log
create log/production.log
create log/development.log
create log/test.log
Rails generates an entire framework for the application. Change into the newly created exchange directory and get to work.
work$ cd exchange
exchange$ ls -p
app/ db/ lib/ public/ README test/ vendor/
config/ doc/ log/ Rakefile script/ tmp/
Setting up the Model and Database Table
At this point many web frameworks would have to use database commands and DDL's to create the table we need to hold our movie inventory data, but thanks to Rails tight coupling between the data and the application we can use Rails to create and manage the tables our project will need. In the Model-View-Controller pattern of application design it's the model that regulates access to the data.
Rails can create the database and tables needed for the exchange project. Look at the file /exchange/config/database.yml, in it you can see the structure of the databases used in Rails:
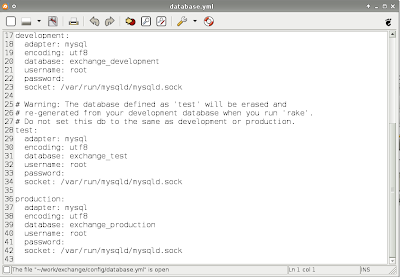
In a difference from earlier Rails versions, Rails 2.0 will create the databases needed with the
Starting the web server
Rails includes its own web server, so let's fire it up and see if we have everything working so far.
exchange$ ruby script/server
=> Rails application started on http://0.0.0.0:3000
[2007-12-13 12:01:16] INFO WEBrick::HTTPServer#start: pid=3637 port=3000
open your favorite browser and point torwards the URL http://localhost:3000
You should see something like:
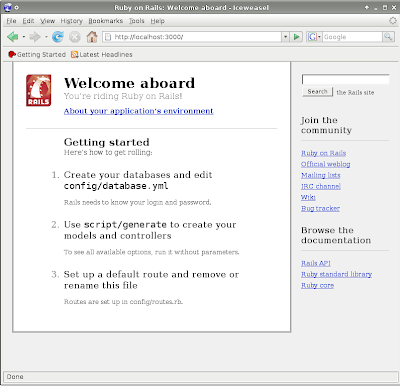
Clicking on the 'About your application's environment' link will activate a little piece of AJAX code that lists the particulars of your rails application.
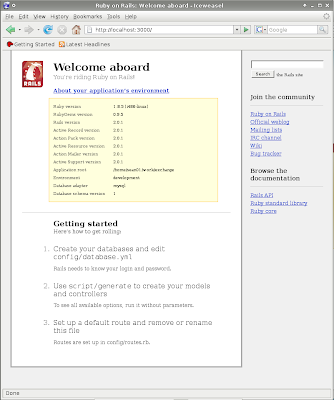
Notice that the default environment is development and not testing or production. This is just what we want during our development phase!
The next steps show where differences between older Rails tutorials will become greatest. Older tutorials would script/generate a model then use the migrate file created to layout columns in the model's database table. Next you would script/generate a controller and add scaffolding.
In Rails 2.0 it will take fewer steps, but may be a little harder to follow because so much is accomplished with so few commands. First we need to think about the movie inventory table.
The following command will generate the model, plus scaffolding, and the database migration
exchange$ ruby script/generate scaffold Movie title:string description:text one_sheet_url:string
exists app/helpers/
exists test/functional/
exists test/unit/
create app/views/movies/index.html.erb
create app/views/movies/new.html.erb
exists app/models/
exists test/fixtures/
create app/models/movie.rb
create db/migrate/001_create_movies.rb
create app/helpers/movies_helper.rb
route map.resources :movies
Making Movies
The table will get created by the file in db/migrate/001_create_movies.rb . Let's look at the file
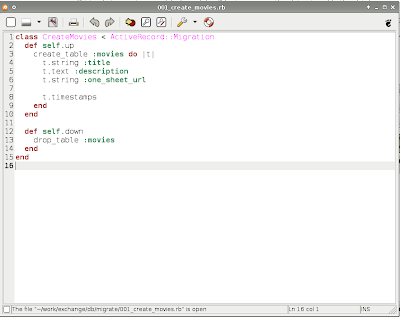
Apply this migration to actually create the table with the command:
-> 0.0040s
== 1 CreateMovies: migrated (0.0042s) =========================================
To see what our work so far has produced, start the WEBbrick server with the command (if you didn't kill the earlier one use a control-c to kill it now):
=> Rails application started on http://0.0.0.0:3000
=> Ctrl-C to shutdown server; call with --help for options
[2007-12-13 17:12:06] INFO WEBrick::HTTPServer#start: pid=4054 port=3000
point your web browse to the URL http://localhost:3000/movies and look at what we have
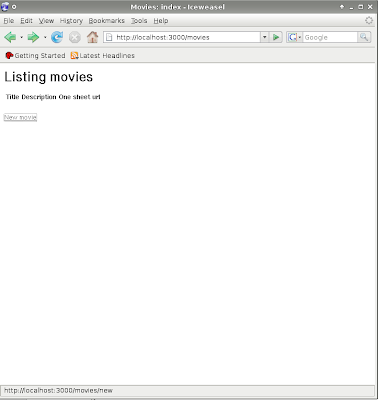
It looks pretty bare, but we don't have any inventory yet. Click on the 'New Movie' link to start adding some movies to the inventory.
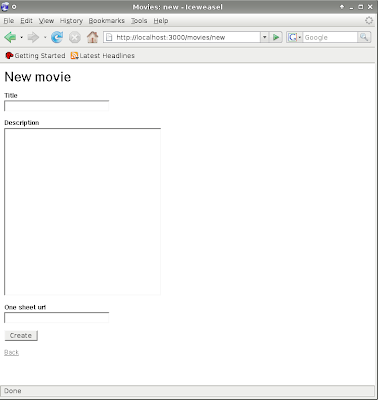
Add a title, description and path to the one-sheet and click Create.
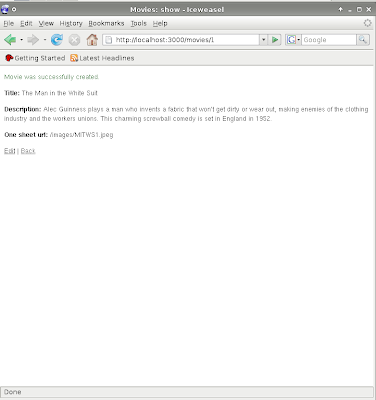
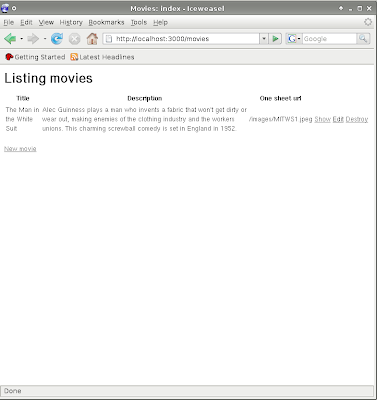
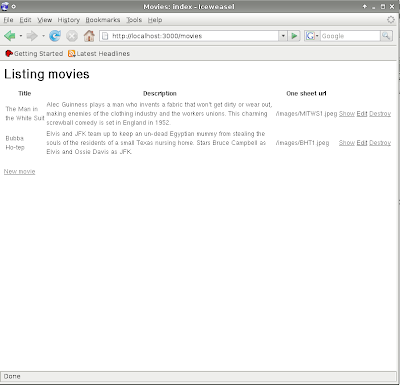
In database terms CRUD is a good thing. Its an acronym for Create, Read, Update and Delete;
What has been done so far?
Installed Rails
#gem install rails --include-dependenciesCreated an aplication with the rails command
$rails exchangeCreated the databases for the application with the rake command
$ rake db:create:allUsed the script/generate command to create the scaffolding for the application
$ ruby script/generate scaffold Movie title:string description:text one_sheet_url:stringCreated the database table using the generated migration file
$ rake db:migrateStarted the webserver with the script/server command
$ ruby script/serverPointed our web browser to the application and started entering and editing data
http://localhost:3000/movies
Part 2
Next time we'll cover some actually coding. We'll look at how to use code in the Model, View, and Controller to alter the exchange application's look and functionality as well as learning about Rails built-in test support.
The purpose of scaffolding is to get started, but scaffolding should be replaced as we add code to our project. The usefulness of scaffolding is that we have an actual functioning application right from the start. We can make a change to the view, and test that nothing else breaks. Then repeat the process adding feature after feature until the application is ready for delivery. Its much easier to make changes to an application that already works than, it is to non-functional code that doesn't give any feed back.


